How do you know when to replace your rotors? Well usually you replace your brake pads first (your brakes will start to feel like they suck or maybe they start screeching) and this should be routine, about 30,000 miles or so (for good ones). If you don't and they wear out, then your rotors will become damaged by the screws on the brake pads after those are worn out, so you'll have to replace that as well (this is usually marked by a grinding sound and feeling - which we felt/heard). However, my brake pads were rather new and my rotors were rather new, but one of the lug nuts was not on tight and with high speed driving and braking (ie. freeways), caused warping in the metal rotors. Lovely (and dangerous)!
So let's begin. It's really not as hard as it sounds (I'm a chick and I can do it)!
Here's what you'll need:

1. Sockets to remove brake caliper
(for our Mitsubishi it was a 17mm. Foreign cars use metric system and domestic cars use standard. I recommend getting a set with various sizes, we use these for the car and both motorcycles)
 2. Socket wrench
(a ratcheting one is even better for tight spots)

 3. Jack and corresponding wrench tools
(should be inside your trunk with the spare tire)
 4. Rubber mallet
(if you don't have one, just use a hammer)
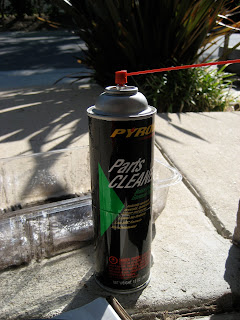
 5. Parts cleaner, small bucket
(also called brake cleaner, but NOT brake fluid)
 6. And of course, a new rotor*
(they can be ordered online or any auto parts store, I got mine at NAPA for $28 each for premium grade)
*rotors and brake pads are usually replaced in pairs for even wear. Tires are usually all 4 but at the very least a pair at a time)
Tools not required but handy to have around for this project:
1. Flat head screwdriver
2. Gloves
3. Rags or paper towels
 4. Torque wrench
(this is not necessary but is an added insurance for securing your wheel. Digital torque wrenches are also available but tend to be more delicate but more accurate. Garage work is usually not delicate so we opted for the cheaper, more durable, analog kind)
(for our Mitsubishi it was a 17mm. Foreign cars use metric system and domestic cars use standard. I recommend getting a set with various sizes, we use these for the car and both motorcycles)
 2. Socket wrench
(a ratcheting one is even better for tight spots)

 3. Jack and corresponding wrench tools
(should be inside your trunk with the spare tire)
 4. Rubber mallet
(if you don't have one, just use a hammer)
 5. Parts cleaner, small bucket
(also called brake cleaner, but NOT brake fluid)
 6. And of course, a new rotor*
(they can be ordered online or any auto parts store, I got mine at NAPA for $28 each for premium grade)
*rotors and brake pads are usually replaced in pairs for even wear. Tires are usually all 4 but at the very least a pair at a time)
Tools not required but handy to have around for this project:
1. Flat head screwdriver
2. Gloves
3. Rags or paper towels
 4. Torque wrench
(this is not necessary but is an added insurance for securing your wheel. Digital torque wrenches are also available but tend to be more delicate but more accurate. Garage work is usually not delicate so we opted for the cheaper, more durable, analog kind)
This is not needed to do the job but came free with my purchase of rotors which was in October (breast cancer awareness month). See? Changing your own rotors are a good thing!

No comments:
Post a Comment