Things people leave out on the counters include oil and vinegar, cereal, flour, sugar, coffee, tea, etc. So here, let me offer you a look at mine:
Dec 17, 2009
Over the Counter
For me, counter space is always rare and at a premium. Whatever is kept out on the counter must be pretty crucial to have such valuable real estate. So I like to see what other people keep on their counters, it's like peeking into their purse (or wallet).
Things people leave out on the counters include oil and vinegar, cereal, flour, sugar, coffee, tea, etc. So here, let me offer you a look at mine:
Left to right: balsamic vinegar, olive oil, pepper mill, infused olive oils solely for looks
Ceramic bowl with lid with garlic, onion, ginger, potatoes
Left to right: walnuts, brown rice, white rice, pasta
What does it say about me? That I'm on the Atkins diet? Or that I should be? Maybe I should empty everything in those canisters and do this? What do you guys keep out on your counters?
Things people leave out on the counters include oil and vinegar, cereal, flour, sugar, coffee, tea, etc. So here, let me offer you a look at mine:
Dec 16, 2009
A Butt of Fluff
A while back before I painted these tables, I discovered a mysterious chunk of fluff stuck to them:

Upon closer inspection, I recognized it as Rylie's tail hair:


Is this another form of natural occurrence in a dog household? Or was she threatened by this post? Is it normal to find chunks of dog fur in strange crevices?
Upon closer inspection, I recognized it as Rylie's tail hair:
Is this another form of natural occurrence in a dog household? Or was she threatened by this post? Is it normal to find chunks of dog fur in strange crevices?
Dec 15, 2009
Cool as a Cucumber Salad
Cucumber salad
Ingredients:
- Cucumber
- Red onion
- Olive oil
- Red wine vinegar
- Salt and pepper
- Peel and slice cucumber (if using Persian or English cukes, skip the peeling part) and toss into bowl
- Chop or thinly slice red onion, and add to same bowl as cukes
- Drizzle with olive oil
- Drizzle with red wine vinegar
- Season with salt and pepper to taste
- Eat and enjoy!*
*if you plan to eat this later, prepare cukes and onion first, then season with salt and pepper and cover and refrigerate without the oil and vinegar. When ready to eat, uncover, dump out extra water that has come out of the cucumbers being salted, and add the oil and vinegar. Everything will be a little softer so you may prefer this method. I prefer crunchy so I eat right away.
Dec 14, 2009
Mow Down
Dec 11, 2009
No Skid Ro-tor (Part 3)
9. Reinsert cleaned (or new if you are replacing those as well) brake pads into the caliper
(there are 2 clips holding the brake pads, use a flat head screw driver to help get them in)
11. Put wheel back on wheel bolts and screw lug nuts back on and tighten
12. Lower car back onto the ground and remove jack - you're almost done!
13. Set your torque wrench to recommended torque specs
(I set mine to 72 pounds)
14. Tighten each nut with one click* (and only one click, if you do it twice you are using twice the torque, ie. in my case it would have been 72 lbs x 2 clicks = 144 lbs).
*with my particular torque wrench, when releasing it makes a quiet click which could be confusing and alarming. Just pay attention to what you are doing and you'll be fine
15. Repeat all this with the other side. You should always replace all brake pads and rotors at the same time to keep even wear.
*with my particular torque wrench, when releasing it makes a quiet click which could be confusing and alarming. Just pay attention to what you are doing and you'll be fine
15. Repeat all this with the other side. You should always replace all brake pads and rotors at the same time to keep even wear.
16. With engine still off, pump the brake pedal to set brake pads against the rotors
16. Disengage the emergency brake, turn on engine and take the car for a drive around the block. Roll your windows down and keep your radio off so you can hear any noises. You should hear nothing.
Silence is golden. Especially when it saves you about a hundred bucks.
16. Disengage the emergency brake, turn on engine and take the car for a drive around the block. Roll your windows down and keep your radio off so you can hear any noises. You should hear nothing.
Silence is golden. Especially when it saves you about a hundred bucks.
Read part 1 here and part 2 here.
Dec 10, 2009
No Skid Ro-tor (Part 2)
Now that you have your materials, here's how to get started:
1. Make sure the car is in park and the engine off and for added safety, engage the emergency brake

2. Loosen lug nuts by turning counter clockwise
(because you can't remove the wheel without jacking the car up and you if you do this after jacking the car up, you'll just be spinning the wheel rather than loosening the nuts, make sense?)

3. Jack car up so that wheel is no longer touching the ground, and don't jack up higher than necessary
(place the jack near the wheel you are working on and be sure that you place the jack on the metal frame and not the plastic body. There are usually notches to indicate which you can see in the photo above and to the right of the jack. If you are still unsure, check the owner's manual - which you should keep in your glove compartment)
4. Remove lug nuts and remove wheel (you should be able to do this by hand since you should have broken the resistance to the nuts in step 2)

5. Remove bolt behind brake caliper* and rotor to release caliper assembly (mine was on too tight for me to loosen by hand so I lightly tapped with a mallet).
*do NOT allow the caliper to hang by the brake lines, have someone hold it or better yet, rig a holder using some wire to secure it. If you break the pressure seal on the brake fluid, you WILL get brake fluid everywhere. Your face, your clothes, the ground, tools - everywhere.


(because you can't remove the wheel without jacking the car up and you if you do this after jacking the car up, you'll just be spinning the wheel rather than loosening the nuts, make sense?)

(place the jack near the wheel you are working on and be sure that you place the jack on the metal frame and not the plastic body. There are usually notches to indicate which you can see in the photo above and to the right of the jack. If you are still unsure, check the owner's manual - which you should keep in your glove compartment)
4. Remove lug nuts and remove wheel (you should be able to do this by hand since you should have broken the resistance to the nuts in step 2)*do NOT allow the caliper to hang by the brake lines, have someone hold it or better yet, rig a holder using some wire to secure it. If you break the pressure seal on the brake fluid, you WILL get brake fluid everywhere. Your face, your clothes, the ground, tools - everywhere.

6. Remove brake pads from caliper, inspect*, and clean using brake cleaner
(warning: this is highly stinky stuff, spray over a bucket and have some rags nearby to wipe dry)
*if your brake pads appear worn, this is when you would replace them. At this point, just pop out the old ones, and insert the new ones.
7. Remove old rotor* off wheel bolts, (if the rotor doesn't come off easily, tap with mallet or gently with a hammer - it's ok since the rotor is metal)
*if they appear to be in decent condition, hang onto them and have them "turned" at a garage (where they grind the surface so the groove is gone) so you don't have to buy next time, or to have spare part on hand

8. Open new rotor, and place on wheel bolts

Left: new rotor on wheel bolts, right: old rotor (which actually isn't very old so that's why we hung onto it)
Read part 3 here.
(warning: this is highly stinky stuff, spray over a bucket and have some rags nearby to wipe dry)
*if your brake pads appear worn, this is when you would replace them. At this point, just pop out the old ones, and insert the new ones.
*if they appear to be in decent condition, hang onto them and have them "turned" at a garage (where they grind the surface so the groove is gone) so you don't have to buy next time, or to have spare part on hand
Left: new rotor on wheel bolts, right: old rotor (which actually isn't very old so that's why we hung onto it)
Read part 3 here.
Dec 9, 2009
No Skid Ro-tor (Part 1)
We're budget conscious people - as you can tell from some previous posts. So that includes car maintenance. I already posted about some cosmetic labor here, so here's a post on something more technical - how to replace your rotors.
How do you know when to replace your rotors? Well usually you replace your brake pads first (your brakes will start to feel like they suck or maybe they start screeching) and this should be routine, about 30,000 miles or so (for good ones). If you don't and they wear out, then your rotors will become damaged by the screws on the brake pads after those are worn out, so you'll have to replace that as well (this is usually marked by a grinding sound and feeling - which we felt/heard). However, my brake pads were rather new and my rotors were rather new, but one of the lug nuts was not on tight and with high speed driving and braking (ie. freeways), caused warping in the metal rotors. Lovely (and dangerous)!
So let's begin. It's really not as hard as it sounds (I'm a chick and I can do it)!
Here's what you'll need:

How do you know when to replace your rotors? Well usually you replace your brake pads first (your brakes will start to feel like they suck or maybe they start screeching) and this should be routine, about 30,000 miles or so (for good ones). If you don't and they wear out, then your rotors will become damaged by the screws on the brake pads after those are worn out, so you'll have to replace that as well (this is usually marked by a grinding sound and feeling - which we felt/heard). However, my brake pads were rather new and my rotors were rather new, but one of the lug nuts was not on tight and with high speed driving and braking (ie. freeways), caused warping in the metal rotors. Lovely (and dangerous)!
So let's begin. It's really not as hard as it sounds (I'm a chick and I can do it)!
Here's what you'll need:
1. Sockets to remove brake caliper
(for our Mitsubishi it was a 17mm. Foreign cars use metric system and domestic cars use standard. I recommend getting a set with various sizes, we use these for the car and both motorcycles)
2. Socket wrench
(a ratcheting one is even better for tight spots)

3. Jack and corresponding wrench tools
(should be inside your trunk with the spare tire)
4. Rubber mallet
(if you don't have one, just use a hammer)
5. Parts cleaner, small bucket
(also called brake cleaner, but NOT brake fluid)
6. And of course, a new rotor*
(they can be ordered online or any auto parts store, I got mine at NAPA for $28 each for premium grade)
*rotors and brake pads are usually replaced in pairs for even wear. Tires are usually all 4 but at the very least a pair at a time)
Tools not required but handy to have around for this project:
1. Flat head screwdriver
2. Gloves
3. Rags or paper towels
4. Torque wrench
(this is not necessary but is an added insurance for securing your wheel. Digital torque wrenches are also available but tend to be more delicate but more accurate. Garage work is usually not delicate so we opted for the cheaper, more durable, analog kind)
(for our Mitsubishi it was a 17mm. Foreign cars use metric system and domestic cars use standard. I recommend getting a set with various sizes, we use these for the car and both motorcycles)
(a ratcheting one is even better for tight spots)

(should be inside your trunk with the spare tire)
(if you don't have one, just use a hammer)
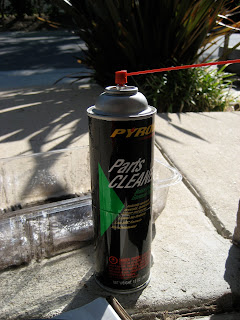
(also called brake cleaner, but NOT brake fluid)
(they can be ordered online or any auto parts store, I got mine at NAPA for $28 each for premium grade)
*rotors and brake pads are usually replaced in pairs for even wear. Tires are usually all 4 but at the very least a pair at a time)
Tools not required but handy to have around for this project:
1. Flat head screwdriver
2. Gloves
3. Rags or paper towels
(this is not necessary but is an added insurance for securing your wheel. Digital torque wrenches are also available but tend to be more delicate but more accurate. Garage work is usually not delicate so we opted for the cheaper, more durable, analog kind)
This is not needed to do the job but came free with my purchase of rotors which was in October (breast cancer awareness month). See? Changing your own rotors are a good thing!
Dec 8, 2009
Wish List
Each year for the past several years, we've requested no gifts for the holidays. Why? Well here, let me list the reasons, I love any opportunity for a list:
- We don't live near any family, so everything would have to be shipped
- Space is precious and limited (especially when we still lived in the apartment) so we don't need any more 'stuff'
- This automatically eliminates any possible stress (did I mention I hate shopping?) on what to get us
- This saves everyone money (we couldn't be happy knowing our gifts are breaking our loves ones' banks)
- If gifts are a must we've suggested options of consumable items, handmade items, or inexpensive items
- This directs the holiday's focus on the more important things rather than the materialistic, like sending a card with a nice message that we are missed and loved
- And if a card was forgotten, a phone call would make us just as happy
- Cash. We will accept cold hard cash. Just kidding. Or are we?
Even though we request no gifts, it doesn't mean we don't like to dream. Here is my wish list of items I need or would love to have! Uh oh, I sense a list forming:
- Bathroom vent because the one in the powder room is about to die any minute now, and it would be nice to upgrade to an integrated light
- Pendant chandelier to replace the ancient one in our stairway
- 2 storage ottomans to replace our coffee table which is heavy and bulky
- TV console because ours is currently too low and Rylie has gnawed on the edges (thanks Rylie)
- 3 bar stools to replace the ones that I sold. These have a smaller footprint.
- Lever for the entryway door to the garage, it's the only one left in the house to switch out
- Dimmable CFL bulbs for the chandelier in the dining room, surprisingly expensive and hard to find
- Area rug for the living room that actually matches stuff and didn't come from a dead guy's house (we bought our current one at an estate sale where the homeowner passed away)
- Buffet/sideboard/credenza/server/console/bar cabinet to store infrequently used kitchen things that are currently in the back of the coat closet
- Electric hedge trimmer to keep the Creeping Fig in check
- Roundup to show Creeping Fig who's boss
- Power core aerator to loosen our compacted lawn (thanks dogs)
- Soil pH and moisture tester to know what amendments our lawn needs
- Fireplace draft stop balloon to well, stop drafts
- Latex Window Glazing, because if you haven't noticed it's really drafty here
- Caulking gun to apply said glazing
- mailbox and new post because our mail box is rusty and won't close all the way and attached to a post that is hanging onto a retaining wall by 1 loose nail
- A hard-sided cooler with drain plug to keep beers in during parties, and to keep our food in at flyball tournaments
- Chiminea or outdoor fireplace because the firepit is really smokey on windy nights
- More solar lights
- Outdoor lights over our garage
- An integrated hose and reel for the front spigot, so I can stop toting the one from the back
- Artificial grass for the incline
- Wheelbarrow for future lawn redo and possibly to cart around a dog or two around the neighborhoods so that we can cement our role as the neighborhood dog freaks
Dec 7, 2009
Stool elimination
Sorry about the post title, I can't get enough of poop jokes...
But this post is about bar stools again. This time, it's not fixing or refinishing, but getting rid of. Last year on move-in day, the boyfriend was sent off to buy a fridge from someone locally, and came home with a pair of these:


And oddly enough, a free book.
Anyway, back to the stools. They were heavy (but sturdy), large, and matched nothing in our house. I'm sure they would fit right in if we lived in a German pub.
So we kept them for a year. And then week before last, I sold them on craigslist for twice the amount I paid for (which was not much). I wasn't sure if they'd sell, but indeed they went. I should have included the book...
But this post is about bar stools again. This time, it's not fixing or refinishing, but getting rid of. Last year on move-in day, the boyfriend was sent off to buy a fridge from someone locally, and came home with a pair of these:
And oddly enough, a free book.
Anyway, back to the stools. They were heavy (but sturdy), large, and matched nothing in our house. I'm sure they would fit right in if we lived in a German pub.
So we kept them for a year. And then week before last, I sold them on craigslist for twice the amount I paid for (which was not much). I wasn't sure if they'd sell, but indeed they went. I should have included the book...
Dec 4, 2009
Tool Around
Thanksgiving was our power tool sandwich. We ordered a cordless drill on the morning of, and a tile saw a couple days after. We didn't plan these new purchases but saw some deals we couldn't refuse.
We've been looking at drills for weeks, maybe even months now, to replace our beloved 12 volt Makita cordless drill (you can spot it here and here). Both batteries have died and no longer hold a charge. At all. We've been doing all our screwing and unscrewing by hand. And when we can't, we resort to nailing. This is making life around the home difficult. Not to mention we can't drill holes at all. We were planning on buying another Makita, as we're big fans of the brand (did you know that they are used in space by NASA?), but we saw a deal on Thanksgiving morning, on Lowe's website ($99) for a DeWalt drill that still kicks our outdated dead drill's butt. And couldn't refuse.
On Cyber Monday (is this a new term this year I don't recall hearing it before), I saw a deal on a wet tile saw ($99.88 - half off, and cheaper than renting) with 4.5 star reviews on Home Depot's website. To be honest, I wasn't shopping for one, but our next big project will be the master bath. And even though we don't know yet what the plans are for that room, it most certainly involves tile (and therefore tile cutting).
Oooh I can't wait for the new gadgets to arrive (I just tracked the packages and the drill is scheduled to arrive TODAY!). Did you score any awesome deals? Are you awaiting fun toys to arrive on your doorstep? Do tell.
We've been looking at drills for weeks, maybe even months now, to replace our beloved 12 volt Makita cordless drill (you can spot it here and here). Both batteries have died and no longer hold a charge. At all. We've been doing all our screwing and unscrewing by hand. And when we can't, we resort to nailing. This is making life around the home difficult. Not to mention we can't drill holes at all. We were planning on buying another Makita, as we're big fans of the brand (did you know that they are used in space by NASA?), but we saw a deal on Thanksgiving morning, on Lowe's website ($99) for a DeWalt drill that still kicks our outdated dead drill's butt. And couldn't refuse.
On Cyber Monday (is this a new term this year I don't recall hearing it before), I saw a deal on a wet tile saw ($99.88 - half off, and cheaper than renting) with 4.5 star reviews on Home Depot's website. To be honest, I wasn't shopping for one, but our next big project will be the master bath. And even though we don't know yet what the plans are for that room, it most certainly involves tile (and therefore tile cutting).
Oooh I can't wait for the new gadgets to arrive (I just tracked the packages and the drill is scheduled to arrive TODAY!). Did you score any awesome deals? Are you awaiting fun toys to arrive on your doorstep? Do tell.
Subscribe to:
Posts (Atom)


