Showing posts with label Bathroom. Show all posts

Feb 15, 2011

Under Foot

It's been a while since the last bathroom update so a lot has happened. Let me catch you up.

We removed the tile floor, toilet and tub and discovered that the subfloor had water damage. Then we discovered that the floor wasn't even properly supported for tile to begin with. So out the entire floor went:


The pipe in the wall is the plumbing vent. The towel is covering the toilet drain. The exposed wood beams are the joists above our newly remodeled kitchen. See how thin the plywood subfloor is?


This is where the sink vanity was.


This chaos is our bedroom.


The old bath tub standing up in our bedroom.


View into the master bathroom. It. Is. A. Work. In. Progress. Ugh.


New drain pipes for the toilet so that we can reposition the toilet away from the tub. One of them is backwards though. Whoops.

Another surprise was a joist in the way of moving the toilet over. We don't mess with structural beams so we were extremely lucky that we were able to move it over under the joist.


This is what we used to join pieces of the A.B.S. drain pipe that we cut to size. I like to refer to it as "Weld-On Abs". Wouldn't it be great if such a thing exists?


Welding action shot.


New position for the toilet. Moved over about a foot to allow room for the new (and wider) bath tub.

What has not been shown are the countless trips to the hardware store, because of all the times we messed up welding the pipes (third try was a charm though!). Certain pieces are hard to find and eventually were found at a large plumbing specialty store nearby.

Also not shown in the photos is how difficult/scary/frustrating working in a bathroom with no floor is.

Feb 1, 2011

Game Plan: Master Bathroom Update

We made some small changes to the game plan:
Going with a fancy tub spout


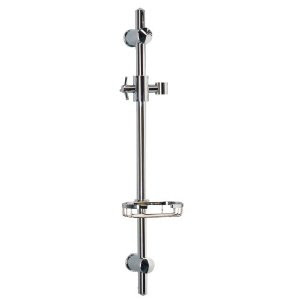
Adding a slide bar to the shower


Instead of the Delta Lahara or Addison faucet, we got the Kingston Brass Concord

A hose for the slide bar and shower head
Adding a niche to the tub surround


Adding a handshower to the slide bar
Bathroom plumbing is way more complicated (and expensive) than we thought.

Jan 28, 2011

Standing Aside

The current master bathroom project has spilled into the master bedroom:


That is our old bath tub standing on it's side in our bedroom. I've lost count on how many times I've stubbed my toes on this. Or how many months it's been sitting there.

Dec 7, 2010

Game Plan: Master Bath

Here is my vision for our master bathroom:


  1. Behr's "Chinese Jade" paint in semi-gloss
  2. Heater bath fan with light in the shower area
  3. 3" recessed lights (the same ones we used in the kitchen) along the long back wall
  4. Big chunky mirror placed over the sink vanity
  5. Sconces to flank the mirror
  6. Possible tall shelving with
  7. Possible resin laundry hamper baskets -OR-
  8. Possible shorter, wide shelving with
  9. Possible bamboo laundry hamper
  10. Marble floor tiles
  11. Natural fiber waste basket
  12. Bath mat, simple and in the same family as the wall paint
  13. Fuzzy bath towels
  14. White fabric shower curtain (like the texture of this but maybe will attract more dust than this one)
  15. Curved shower rod
  16. White subway tile for tub surround
  17. Delta "Addison" tub and shower hardware
  18. Whirlpool tub
  19. Delta "Lahara" widespread sink hardware (although we are also considering the similar "Addison" as well)
  20. Brentwood 42" sink vanity with Italian carrara white marble top
Any thoughts on which shower curtain to go with? Which faucets? Which hamper? Which storage shelf?

Nov 1, 2010

Pick Up Our Marbles

Although we may have lost our minds in any given home project, we've definitely picked up some literal marble for the master bath renovation:


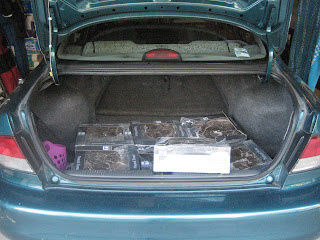
You're looking at 7 packs of yummy chocolate marble tile in the back of Mitsi:


Just look at those tasty veins. I think this is going to be my favorite aspect of the new master bath.


See how those stacks of marble tile are now magically stacked in the garage? Yep, that was from yours truly. You just missed the gun show.

Oct 27, 2010

Hit the Fan

While I was away from home on extended travel, the bf surprised me with installing a new bathroom vent that I had ordered a while back:


We don't have a before shot of what was there, but it was a regular vent with no light. An old vent that sounded like it was on its last legs (and it was metal, which I had never seen before, I had only seen plastic ones, have you?).

Anyway, we love the new fan, it's quiet, it's modern, and it even works as a light fixture. In fact, it makes the rest of the bathroom look outdated in comparison. But there was one big problem I encountered once I got home in person:


That big obnoxious logo right in the center of the glass dome. I wrote to the manufacturer to no avail and then read on some forum where most people shared the same problem, that the logo is not actually etched into the glass.


So I took to some high tech tools:


Put in the tiniest sliver of elbow grease:


And, voila!


If you own the Hunter 90053 Saturn fan, here's your solution!

Oct 25, 2010

Tub Thumping

For a while now, I've been researching tubs, trying to decide which was right for us and our master bath. I wanted a whirlpool tub, 36" wide, with a tile flange, in white, for an alcove installation. And I wanted it around 1k shipped.

Our first foray into tubs a few months ago brought us into Warehouse Discount Center. If you remember from my experiences with them last year, I am not a fan of that store. But I wanted to see if they could ship something for free since we live so close or had some floor model for a steal. Anyway, after being told about a local company that makes every tub to order, and customizing a tub with the standard amount of jets, and some lights thrown in for funsies, the quote came in at 2k. WDC how quickly you remind me of how much I hate you. I will never get those 20 minutes of my life back.

6 weeks ago, I was feeling pretty good that I had our choices narrowed down to 2 tubs:
KOHLER 6036 Whirlpool, White - $960 with free shipping (photo credit: Home Depot)

KOHLER Windward 5 Ft. Whirlpool in White - $1237 with free shipping (photo credit: Home Depot)


Then I went across the country for 3 weeks and forgot all about this. The bf called one day to tell me about his day at WDC (ugh, no!) and how he actually scored a deal of the century on a whirlpool bath tub. This is what he got for less than half of what they originally wanted:
It fits almost all of our requirements* and best of all, I don't have to worry about bath tub research anymore!

*our tub will have whirlpool jets. The only requirement the tub order didn't fulfill was shipping, but we live conveniently close so at least we don't have to pay for shipping (aside from a truck rental).

Sometimes slacking umm I mean patience really pays off!

Sep 9, 2010

Cold Shower

Remember when I removed the shower doors?


I removed them because they weren't doing their job. Or more accurately, they weren't installed properly in order to do their job. See what happens?


You can literally see where the water trailed down the wall and continue on their destructive journey down to the molding:


Luckily, there was no water damage to the studs or the sub floor. Nor any termites.


But now I'm left with the gunky adhesive caulky residue left from the shower doors. I thought about keeping the tub for a future guest bath remodel but I don't feel like laboring over this if it won't even come out. Does anyone know?

Sep 7, 2010

Master Bath D-Day 4

If you remember from previous photos, we have 2 large wall mounted mirrors in the master bathroom. They are not mounted with little plastic brackets, they are held onto the wall directly with adhesive. Well not anymore! Here is what you'll need:
  • work gloves
  • contact paper
  • thick wire
  • patience

First we covered the mirror with the thickest contact paper we could find. Tape just wouldn't cut it here. It reinforces the mirror and also keeps shards at bay if it breaks.

Then holding the wire taut, slowly run between the mirror and the wall. In our case this method didn't work that well as it just got gunked up with adhesive but still try it anyway.

In the end we just slowly pried and pulled the mirror off the wall directly:


It worked with one mirror but not entirely with the other:


I'm thinking of salvaging the broken mirror by cutting it down to window size and inserting into a window frame. Or building a frame out of molding and attaching to the mirror. Suggestions?

Aug 12, 2010

Master Bath D-Day 3

Now that the master bath has been cleared out, we proceeded to the flooring. You see, it was boring white square ceramic tiles with highlights of hideous shades of orange. I like orange, and have nothing against that color but what were the PO's (previous owners) thinking when they chose to put that in a room that received no sunlight with overhead fluorescent lighting?


And so out it went. For this job, make sure the toilet drain pipe is covered to protect it from debris falling in. Also put up plastic drop cloths to prevent dust and tile chunks from flying into any nearby rooms (we didn't have to do this as we just closed the bathroom door).

What you'll need:
  • rubber mallet
  • crow bar
  • hammer or metal mallet (forget what this is technically called)
  • grout removal tool
  • metal putty knife
  • floor scraper
  • dust pan and broom
  • dust mask (I know the bf isn't wearing one in the above pic but apparently he doesn't care about his lungs)
I also suggest ear plugs of some sort, this process gets loud.

Take the grout removal tool (which is basically a stack of utility blades with one handle) and run along the ground lines (it will make an awful sound. Like fingernails. Along a chalkboard. A very clean one. Times 10).

Then take the rubber mallet and lightly pound the tiles that you have used the grout removal tool along to loosen it up. Work in sections, like one entire row at a time.

Now take your crowbar and hammer (or metal mallet) and pry off the tiles. They should start to come off. Then use the floor scraper and the tiles should come off in whole pieces (which will make for less dust and way easier clean up).


And if a ton of grout was used, then you've just got to smash the hell out of the tiles. Clean up will suck. But at least you can unleash your aggression on the stupid ugly tiles.

By the end of this, you'll be deaf and your arms will want to fall off (if you are hauling loads of broken tile from the second floor, that is).

Any better tips to this type of demolition? Or tile hauling? Did you actually like the orange tiles? Are you the PO's that picked it out? Care to defend it?

Aug 4, 2010

Not the Best Medicine

Included in the removal of the vanities, sink, and toilet, I also removed something really minor:


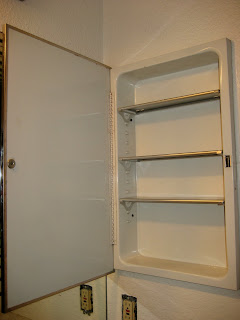
I just unscrewed the 3 screws on the inside of the medicine cabinet:


Which left a nook with unprimed drywall and wood:


I actually really like this open nook much better. Remember when I did this with the kitchen ceiling?

Does your home have those side medicine cabinets? Are you with me on the open storage nook? Do you want my medicine cabinet? Ideas on what to do with it?

Aug 2, 2010

Master Bath: Floor Plan

Here's a floor plan I created for the current layout of our master bathroom (scale 1 cm = 1 inch):


(Like how I incorporated the ugly oranges and yellows from the old tiles? Details people!)


The new floor plan is ever so slightly changed. We're planning for a 6" wider bath tub, moving the toilet over 6", and a 1" wider sink vanity. We're planning to place a storage shelf or hamper where the old pseudo-built in vanity used to be.

I'm also hoping for lush chocolate brown tile floors. But not a gray bath tub or sink...